Create your first AI video
Step by step: sign in, write a prompt, pick a model, set aspect ratio, duration and resolution, generate, and download your first AI video on Sunra.
This is the fastest path from a blank page to a finished clip — about a minute from prompt to playback. You'll sign in, describe a shot, pick a model, set a few options, and generate. Every step below maps to something you'll see on screen, so keep the video generator open in another tab and follow along.
1. Sign in
Generating requires an account, so sign in first. It's free and instant with an email code or Google — no password to remember.
2. Open the video generator
Go to the video generator and stay on the Create Video tab. The whole tool fits in one panel:
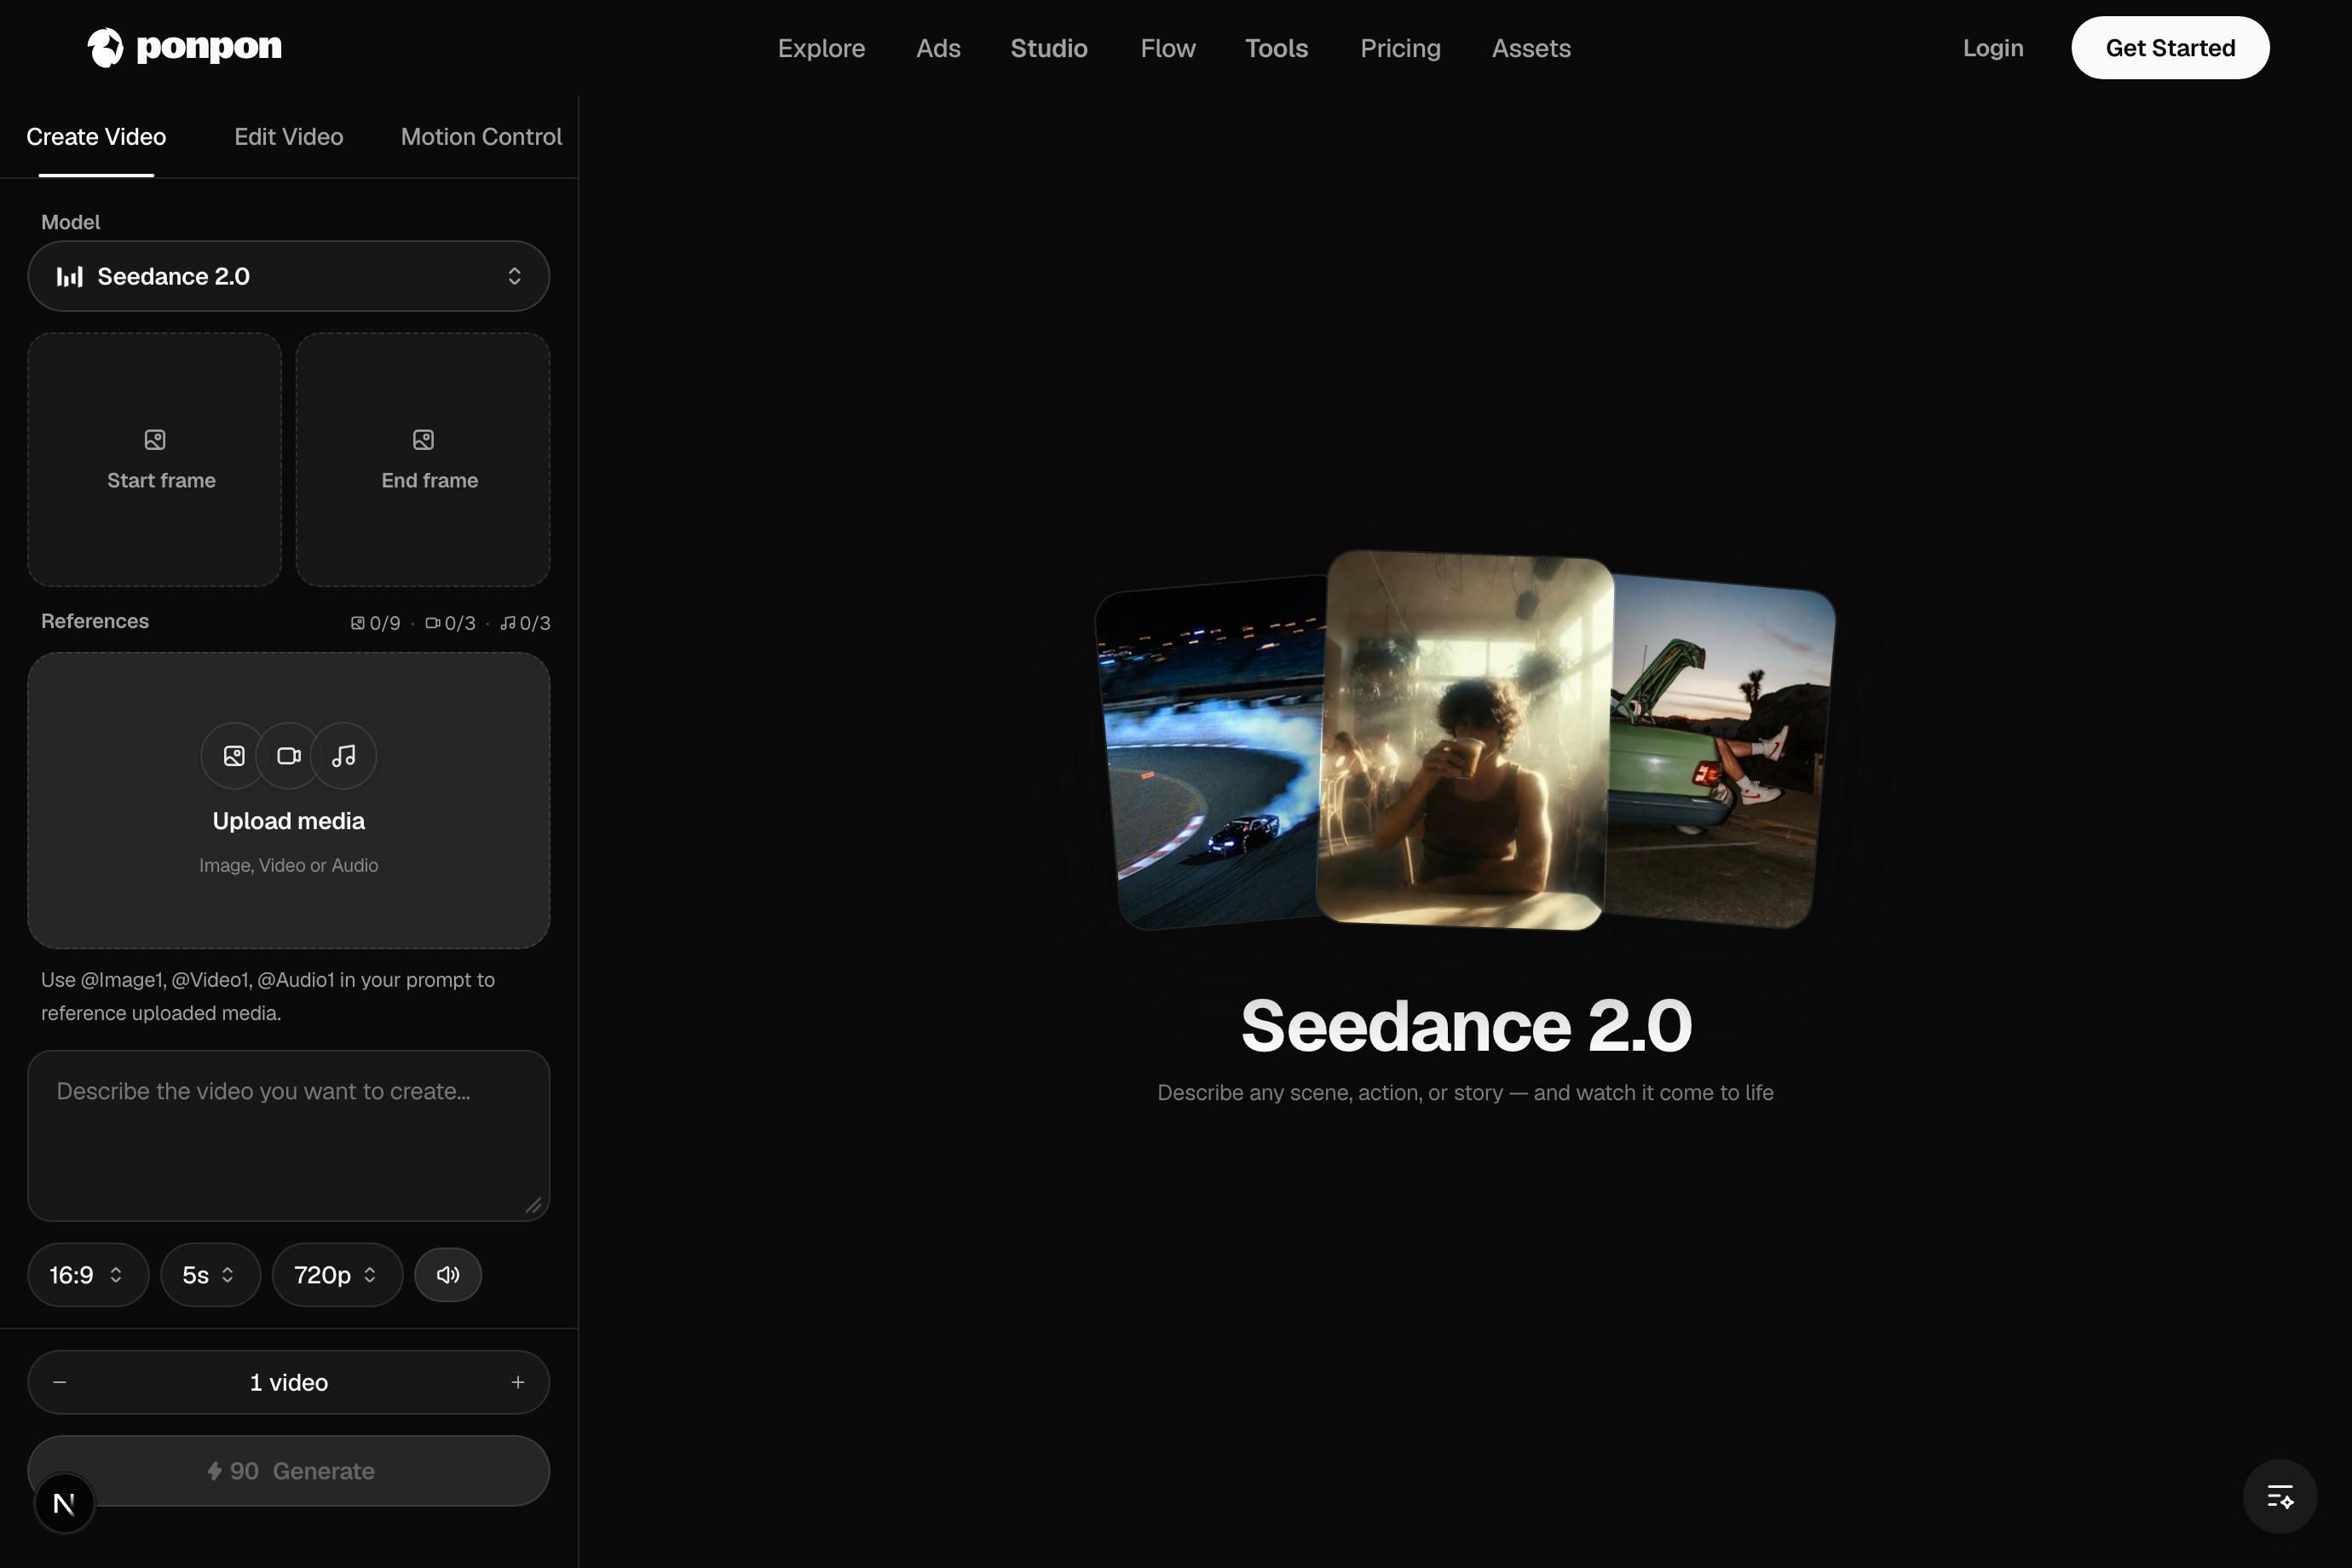
- Model picker (top) — the engine that renders your clip.
- Start / End frame — optional images to animate (covered below).
- Prompt box — where you describe the shot.
- Aspect ratio, duration, resolution, audio — the controls along the bottom row.
- Generate — shows the credit cost before you commit.
3. Write a prompt
Describe the subject, the action, and the setting in a sentence or two, then name the camera move:
A golden retriever puppy runs across a sunlit beach toward the camera, sand kicking up behind it, waves rolling in the background. Slow tracking shot, warm late-afternoon light.
4. Pick a model
The picker is a row of chips. Each model has a personality:
- Seedance 2.0 — fast and expressive, vertical-first. A great default for social clips.
- Veo 3.1 — strong realism with the best camera direction and native audio.
- Kling 3.0 — precise motion, lip-sync, and multi-shot storytelling.
- Sora 2 — standout physics and texture realism.
Not sure? Start with the default and switch later — the same prompt carries across models, so it's cheap to compare.
5. Set aspect ratio, duration, resolution
- Aspect ratio — 16:9 for YouTube, 9:16 for TikTok / Reels / Shorts, 1:1 for feed.
- Duration — the options depend on the model.
- Resolution — defaults to 720p; the available steps depend on the model.
- Audio — if the model supports it, leave the audio toggle on to get sound generated with the picture.
6. Generate
Press Generate. The clip renders in the background — you can keep editing or start another while you wait.
Prefer to animate an image?
There's no separate mode — Sunra infers it from your inputs. Upload a Start frame and the model animates your image as the first frame (image-to-video). Add an End frame for a start→end morph. Attach reference images and capable models do reference-to-video instead.
7. Download or keep going
When it's done, download it, or send it onward:
- Sequence and re-run shots in Flow.
- Add a voiceover, music, or sound effects in the audio tools.
- Drop it into your project beside other takes to compare.
Tips for a better first result
- Change one thing at a time between attempts so you learn what each word does.
- If the motion looks busy, simplify — fewer subjects, one clear action.
- When you've got a prompt that works, save it; small wording tweaks carry across models.
Ready to go deeper? Text-to-video basics covers the four input modes, and Prompting for video covers shot grammar end to end.
Related articles
- Text-to-video basicsHow video generation works on Sunra: text-to-video vs image-to-video, choosing models like Veo 3.1, Sora 2 and Kling 3.0, and the Edit and Motion Control tabs.
- Prompting for videoA practical method for AI video prompts on Sunra: shot structure, the camera presets the models understand, pacing, model-specific tips, and fixing common failures.
- What is SunraSunra is an AI media studio — generate video, images, and audio, edit them, and run one-click effects, with 30+ models in one browser tab.